a few words about miss chelsea elizabeth...

she likes: making kites, dancing in the rain, adventures, little-while friends, letters, whole-leaf tea, crayons, bare feet, jumping in rivers/streams/creeks/waterfalls, language, catching the clock as it changes numbers, sleepovers, trains (big or small), cuddling & waking up before the sun rises, among other random things.

oregon-born, seattle-raised, bellingham-bred and franco-refined, she had moved back to the states from her affairs across the atlantic & now resides in columbia city with french husband & love of her life rémy. they spend most of their time taming the garden, taking care of their three chickens & two cats, and preparing the urban homestead for a new little chick of their own.

Saturday, February 20, 2010

sculpture

i find sculptures fascinating. not so much because of the end product, but because of the process. how someone can look at a hunk of rock and see venus de milo somewhere under all those layers, i find it absolutely incredible. how they slowly, patiently chip away at the unnecessary pieces. and what a violent image it is, too, no? hammering away, chunks of rock and sand and dust strewn about at the feet of the sculptor. and the artist's tools, are they not also found in the hands of vandals? used to demolish houses? used to crack through ice or smash in walls? slice, prick, perforate, penetrate, puncture, stab. these are not pretty verbs, but all of them apply to hammers and chisels and saws and drills. mallets, axes, and water erosion machinery.

it's a violent, violent process it seems.

and yet the end product is stunning, simply spectacular. how do they do it?
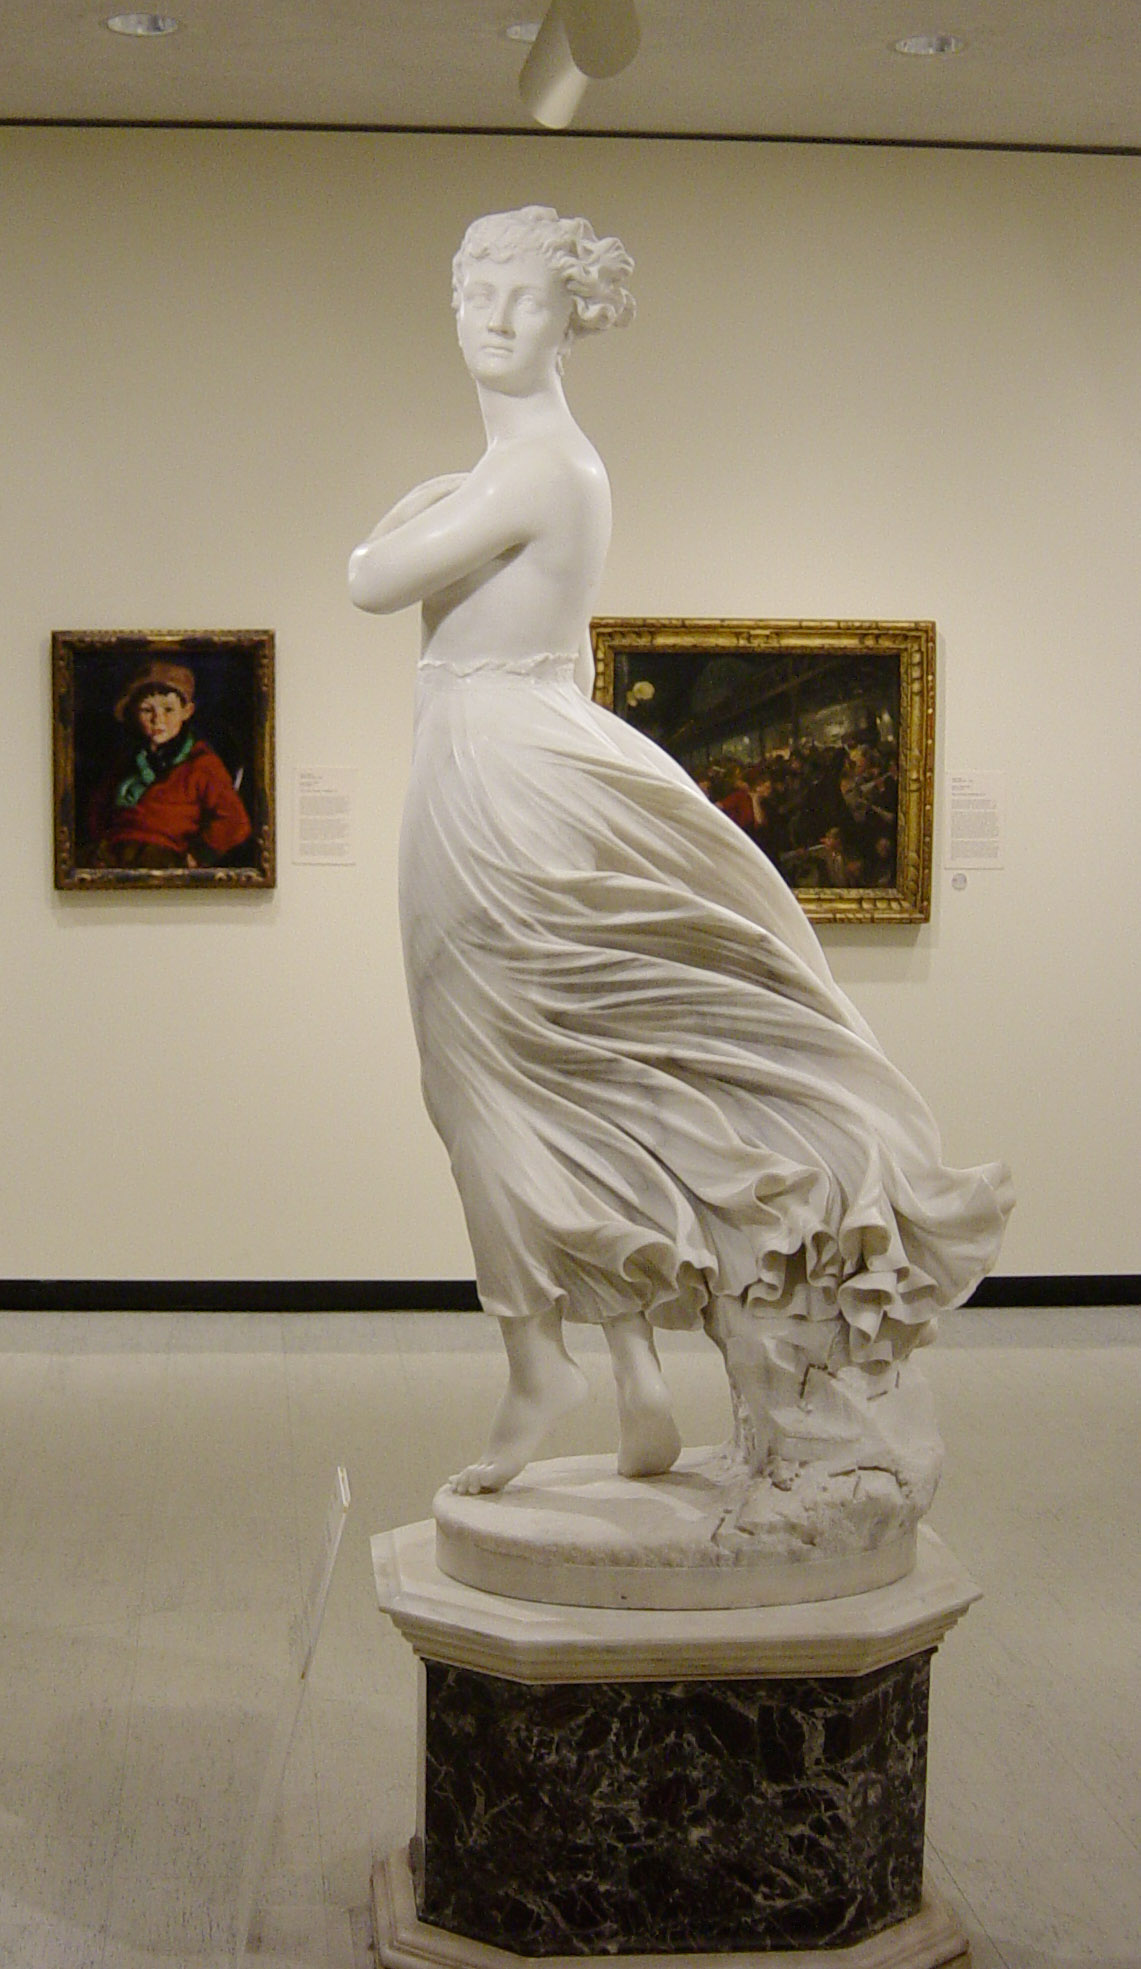
and how many of us look at something as magnificent as the west wind (above, by thomas r. gould) and see the hunk of plain marble that it used to be? or admiring a totem pole see the log it was carved from? or better yet, that single tree chosen somewhere deep within a whole forest?

i fear not many of us do.

for a long long time i felt my own life was being chipped away at. pieces of me broken off, parts i can never get back. and just thinking about it hurt. lately i've been seeing it from a different angle. i can't help looking at the rough, course, distorted image of who i am now and imagining the beautiful sculpture that is being revealed. i only hope i'll be finished before my time on this lovely earth is up.

i'll leave you with part of the opening monologue from shadowlands by william nicholson:

"we're like blocks of stone, out of which the sculptor carves the forms of men. the blows of his chisel, which hurt us so much, are what make us perfect. the suffering in the world is not the failure of god's love for us; it is that love in action. for believe me, this world that seems to us so substantial is no more than the shadowlands. real life has not begun yet."


Tuesday, February 16, 2010

quarter century club

well, life sure has creeped up on me. i had forgotten how fast time flies when you actually have things on your schedule. and being employed has made me see how horrible i've gotten at time management.

and now all of a sudden my birthday has come and gone and i've realized how OLD i feel. or maybe old isn't the right word. i am well aware that twenty-five is not fifty or even thirty, but it's right around the corner! i am officially approaching thirty freaking years old and i have no idea what i am doing with my life!!! it's a scary concept.

but despite my backward/hippie/gypsy (as my grandpa would say) ways (as in the fact that i have little money, even less career, and no signs of either one coming to me anytime soon), looking back on the past few years i can see how much i have accomplished.

let's make a list, shall we?
- ran a marathon at 19
- graduated cum laude in four years with two bachelor degrees at 22
- lived/worked in taiwan
- moved to france (to work) at 22
- rode my bike to spain from central france at 23
- traveled around the entire US at 23/24 (visiting 32 states)
- married a frenchman at 24
- suceeded in the horrifying process that is immigration
- learned to grow my own food/maintain a garden
- learned to cook amazing stuff (homemade breads, homemade soy milk/tofu, homemade wines)
- sucessfully found a job in a foreign country
- started saving for future bike travel around the world

of course there are plenty of things i'd love to accomplish before i hit the three decade mark, but then again five years is quite a chunk of time when you really think about it. until then i guess i'll just keep following my heart and keep my mind open to life's little surprises and we'll see where in this beautiful world i end up!


Monday, December 14, 2009

happy holidays!!!

our first christmas as a married couple, tippen's first snow, our first christmas tree!!! 'tis the season!!!


clermont at night is all lit up this time of year.


there is a HUGE ferris wheel that comes to town every december,
and of course the giant christmas tree.


this is the church about a block from our house in chamalières.
also lit up.


where's tippen???
in his favorite spot this season.
(& mom/dad's least fav spot...)

we even painted the windows with snow!


& i made a wreath out of random branches i found
on top of someone's garbage can.


our first christmas tree!!!!
(with actual presents!!!)
happy holidays from across the pond!!!


Sunday, December 13, 2009

soy milk!!!

I have been wanting to make homemade soy milk for years now, but it always seemed like it should be really complicated and hard to do. Well, my friends, it's not.

There are basically two ways to make soy milk:

1) Blend, strain, cook.
2) Cook, blend, strain.

The first is the traditional Japanese method, so I decided to try it.
***WARNING***: this method makes a VERY strong tasting milk. If you don't like the taste of soy, I'd recommend trying the second way instead for a milder taste.


What you need:
_Dried soybeans (the yellow, not the green, and I prefer organic)
_Water (you basically use twice as much water as you do beans, but you can always add more if needed)
_Sweetener (optional, but most people will want to add either honey, vanilla or almond extract, maple syrup, or any combination of above to sweeten the milk a bit)
_Cheesecloth (there's no debate here; you absolutely need it)
_A big pot


Steps:
1: Fill up a big pot with room temp water and add the beans (I used 500g and got about 3L of milk, but you can use more or less depending on your needs). Let them soak over night. The beans will double in size by morning. Rinse the beans with fresh water in a colander. Pick out the discolored/gross-looking ones and any dirt you can.


the beans, the next morning. notice the discolored ones. pick those out.


2: Try to remove as many skins as you can by rubbing the beans between your fingers, but don't sweat it if it takes too long (similar to removing skins off garbanzo beans).

3: Blend the soybeans in batches in a blender with twice as much water as beans. The finer you grind, the more soymilk you can extract, and don't be afraid to add more water.


it should look kindof like a milkshake when you're done blending.


4: Pour the slush through cheesecloth, letting the liquid drip into a large pot. Twist the cheesecloth to extract the milk and let it drip for a few minutes. Put the bean curd, "okara" on a plate to the side.


5: Reblend the okara once or twice more, adding water, to extract all the soymilk you can. Strain it with the cheesecloth as you did before. If you want, put the "okara" in the freezer to use later (there are many many yummy recipes using this, but you must cook it before eating).


the bean curd is also known as okara. it can be used to make meatless patties, meatless meatballs, can be added to soups and stews and is very high is protein & iron. it must be cooked before eating, though.


6: Scoop off the white foam on the surface of the milk. Bring the milk to a boil. Add your sweetener (I added three large tablespoons of honey & a tablespoon of vanilla) & stir. Reduce heat to medium and let simmer, partially covered, for 30 minutes, occasionally adding water lost by boiling. As with cow's milk, skin will form on the top layer of the milk. Either constantly stir the milk to avoid the skins or just remove them as they form.


scoop off this white foam, either with your hand or a spoon. otherwise the milk will be bitter.

i used honey & vanilla, but maple syrup is a very good sweetener, too.

make sure it's partially covered when you simmer. this helps keep the temperature up without losing too much water. if it gets too thick or too bitter, add more water as you go along.


some people like to dry the skins on chopsticks and use them in other food. they are useful in making fake meats, and are tasty when added to pretty much anything. i didn't have time, so i just threw them away.


7: Filter, bottle and let it cool in the fridge.


filter just to make sure you didn't let any grains slip by.


tadah!!


8: Enjoy!!!

rémy really enjoys it warm; we use it to make hot cocoa and/or just warmed milk with honey.


like i said, this method results in a very bold flavor, which (if you're not used to soy milk) may take some getting used to. the taste is more mild warm than it is cooled. you can always cut the milk with water, too, to make it thinner later. i plan on trying the other method soon, too, and will most certainly let you know how it turns out!!

Friday, November 13, 2009

bagels!!!!

so while browsing the book section at our local grocery store, rémy came across this lovely book. i flipped through it and fell in love. marc grossman, the author, is an american living in paris and the creator of bob's juice bar and kitchen (both restaurants in paris). apparently when he first came to france he missed bagels as much as i do & decided to do something about it. years of trial & error led to this fabulous book.


i highly recommend this book to anyone, although it is written in french. i'm not sure if there is an english version available, but with recipes it's pretty straight forward anyway.

i will not be sharing the amounts required, you've gotta buy the book for that. but i will show you the steps on my very own first bagel-making journey!

the ingredients:
the bagels: flour, wheat gluten, yeast, salt, tepid water, malt syrup or molasses, olive oil
for the baking sheet: corn flour, butter
for poaching: water, potato starch, malt syrup or molasses or brown sugar, salt
as garnish: poppy seeds, sesame seeds, garlic, onions, salt, whatever you want!

directions:
mix up the dry ingredients.
(flour, salt, yeast, wheat gluten)

mix up the wet ingredients.
(water, molasses, olive oil)


mix the wet into the dry.


knead, twist, pull, punch for a good ten minutes.


form ten even round little balls.


roll each one into a nice thick worm.


wrap it around your fist and gently pinch the edges together.
(if the dough is too dry, you might need to add a bit of water to make the ends stick.)


your rings should look something like this.


place them on a well-oiled sheet, cover them with a clean dish towel & let them rise for an hour or two, until they're about 80% of their final size.


add all the poaching ingredients to a big pot & bring the liquid to a boil.
plop a few of the uncooked, risen bagels in there. after a few seconds they'll float to the surface.
let them poach for one minute, then flip them over for 30 more seconds on the other side.


butter & corn flour a sheet of wax paper (which you'll use to cover the baking sheet).


garnish the still-wet-from-poaching bagels with whatever you fancy.
here we have (from l to r) natural, poppy seed, sesame seed.


and onion (top) & garlic (bottom).


preheat the oven, pop those babies in there & let them cook for 20 - 25 minutes,
until they're nice & golden brown.


ta-dah!!! my first attempt at bagels was a major success!!!


delish!


homemade plain bagels with homemade chive/coriander cream cheese.


rémy thinks they're mmm mmm good!


then we made delicious tuna melts.


after two giant bagel tuna melts, mateo was pretty satisfied.
(& might i add that mateo had never tasted a bagel before mine...)


too many bagels!


the next morning, a deliciously toasted homemade bagel with delicious homemade chive/red pepper cream cheese.

honestly, they take a bit of time (with the kneading & rising & poaching & baking & all), but they were SOOO much easier than i had expected and turned out absolutely fabulous. i fell in love with baking bread a few months ago, and i do believe i have just fallen even more in love with making bagels. it is so definitely worth it & i highly recommend giving it a try!
happy baking!